This week we had to look at making web sites more accessible. By and large I was already implementing the features that are required for this. It took a small amount of research into my most disliked of XHTML elements, tables, to discover yet another reason to dislike them.
Don't get me wrong, I understand the need for tables in web design, I just really don't like having to use them after having switched to XHTML and CSS. This became even more true when I researched how to make them accessible to people. Each <th> tag requires an id attribute that will be referenced by cells within the table, so that people can make sense of them regardless of how the data is presented to them.
As a primarily PHP orientated coder I can see how easy it could be implemented within a site, it is really frustrating to have to code in manually. Roll on server script?
JavaScript
Carrying on with doing research into the topic of the week I am, this week, looking into javascript. Wikipedia describes JavaScript as the following:
JavaScript is an object-oriented scripting language used to enable programmatic access to objects within both the client application and other applications. It is primarily used in the form of client-side JavaScript, implemented as an integrated component of the web browser, allowing the development of enhanced user interfaces and dynamic websites.
I must confess that I have, in my design experience, by and large, skipped past JavaScript and hopped straight to jQuery, a JavaScript library. As such, my knowledge of JavaScript is somewhat limited. I have made limited use of it, whilst developing my first jQuery piece of work. Whilst I understand the ideas behind it, as it works in a very similar fashion.
As a part of my research into the basics of JavaScript, I looked into additoinal online resources of JavaScript Tutorials that I could use to help guide me with the completion of the tasks we had, to deal with using JavaScript as part of a web site, adding additional functionality to it, changing the background colour and also providing alerts to the site's users. I found the following resources to be useful.
This week and next I have various practical pieces focused upon developing my knowledge of javaScript Functions. Whilst I may have very little knowledge of actual JavaScript, having jumped straight into jQuery, I do have a pretty good knowledge of functions, having used them in both jQuery and in various PHP Applications.
This provided me with a firm basic knowledge that allowed me to quickly and easily work through the practical work assigned for weeks 5 and 6 with very little effort.
This leaves me free to focus upon the group project for the next week and a bit, which I shall cover in more detail in next week's independent learning.
Site Layouts Part 1
Picking up from last week's Independent Learning is a bit of insight into my Group Project work. As I've mentioned over in that section of my Learning Log we have already worked out is what each member of the team is responsible for. One thing I have a horrible tendency to do a lot of these days is to sketch out web design concepts, something my team members are well aware of, which I think is at least partially responsible for my being given the task of designing the look and feel of the site, with feedback from other members.
The actual sketches I produced for this group project can be seen in the Group Contributions section linked at the top of this page. I intend this area to be more about the process involved with creating a site concept starting, this week, with the sketches and progressing over the following weeks, as the site progresses, covering the process.
Site Layouts - Sketching
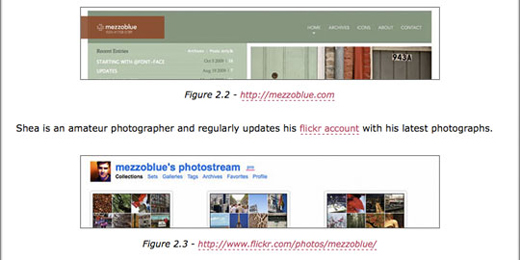
The above image is taken from a recent article published in .net Magazine entitled "How to create your best layouts" and was written by Elliot Jay Stocks, a well known web designer that I very nearly researched as part of my DES311 research work. I will almost certainly refer to it, and possibly other articles, in the coming weeks to support my approach to developing the look and feel of the Group Project site.
Elliot suggests keeping away from the computer for the initial stages of conceptualising a site. Creativity is a very difficult thing to express at times, even more so when trying to use a computer interface. This makes Elliot lean more to a traditional method of pen and paper being used, it allows for him to quickly sketch out a design as it comes to him. He explains it rather more elegantly though:
There are a number of ways to approach this stage. Some like to jump straight into Photoshop (or their layout tool of choice), but personally I try to stay 'analogue' for a while and work with good ol' paper and pens.
Such tools are far more freeing than using a mouse and computer screen. They enable us to throw down ideas as soon as they come into our heads and be as expressive as possible, having absolutely no concern for things like neatness, which - at this stage, at least - just get in the way of creativity. If you haven't worked this way before, give it a try: it's extremely liberating.
Elliot Jay Stocks. (2009). How to create your best layouts. .net magazine. 194, 38-42.
This is actually a lesson I learned last year as part of the Foundation Degree Course I attended, whilst on placement. I had never really bothered to "concept" a web site before this, instead jumping straight into the design phase. Looking back at my work now it really shows through.
Now, however, I find myself sketching ideas as they pop into my head, whenever they pop into my head. I carry around a few file blocks with me at all times for just this purpose, so I'll have somewhere to sketch down ideas as I have them. I also carry a blank book for me to transfer anything that I really like the designs of. Currently this consists of multiple icon designs and a single web page sketch but I feel that, over time, this will become a much more useful resource to me, providing me with a handy resource of site designs I can take inspiration from.
That about sums up this week's Independent Learning. The site concepts for the group project can be found in the Group Contributions section of the Learning Log.
References
Elliot Jay Stocks. (2009). How to create your best layouts. .net magazine. 194, 38-42.
Site Layouts Part 2
Last week I covered the basic concept of one way to approach the concept of a web site design. This week I will discuss what many view as the next logical step from a rough sketch, cleaning it up as a wireframe.
Wireframes?
Wireframes cover a vast range of possibilities and can often vary in definition from project to project. Some people go into a great amount of detail in their wireframes, working out in great detail where everything will be positioned. Others view it as a neatened up version of their finalised sketches. Personally I use this as a chance to decide on how my design will look, making use of a grid system to help create a solid design ready to be converted into code at a later date.
What are Grid Systems?
Grid Systems are used to provide a flexible, yet useable, layout for web site designs. My grid system of choice, 960.gs, describes their system as the following:
The 960 Grid System is an effort to streamline web development workflow by providing commonly used dimensions, based on a width of 960 pixels. There are two variants: 12 and 16 columns, which can be used separately or in tandem.
Bryan Veloso. (2008). 960 Grid System. Available: http://960.gs. Last accessed 12 October 2009.
960.gs is but one of several different grid systems available. I use it because it provides material not just for use in web design, but also for use in various software packages that are used to create concepts for finished pieces. This is particularly useful as it gives a constant standard that can be used throughout, making creating the site from the graphic much easier.
This concludes my experimentation for the week. Next week's experimentation will pick up where this week leaves off, going into detail with regards to converting a graphical piece into an actual site, as well as some ideas to consider when designing a site.
References
Bryan Veloso. (2008). 960 Grid System. Available: http://960.gs. Last accessed 12 November 2009.
Site Layouts Part 3
Last week I covered the idea of wire-framing and the use of grid systems in conceptualising a design. This week I am going to talk about the next stage, designing for (and in) the browser.
Designing IN the Browser?
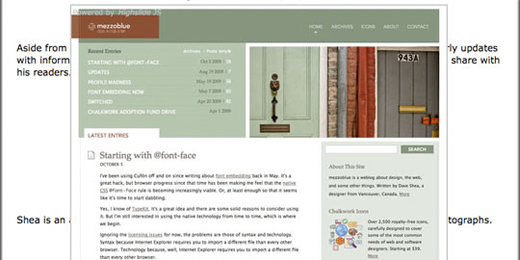
Yes, you read that right. This might sound odd, but Elliot Jay Stocks explains it in a way that makes sense:
As time goes by, I find more and more that there isn't really one tool to do all the jobs that I needs, and I find myself increasingly turning to the browser and treating it as a design tool in itself.
There's one easy-to-spot why designing in the browser makes a lot of sense: it's where the site, once finished, will be viewed. There are a variety of other reasons, but for me typography is one of the biggest ones - I've yet to find an application that can accurately simulate the way type appears in the browser, and as text is rendered differently in different browsers and on different operating systems, there's no one true 'correct' rendering anyway.
Elliot Jay Stocks. (2009). How to create your best layouts. .net magazine. 194, 38-42.
He then goes on, in the same article, to highlight how designing in the browser allows for a great deal of flexibility in terms of 'tweaking' aspects of the project. Plugins for Firefox such as Firebug (also available as a bookmarklet for other browsers) allow for temporary inline editing of page content, allowing you to quickly test changes, or bug fixes, in a non-destructive manner. That is to say, nothing that you implement this way is permanent.
Another bonus to designing in such an approach is that you don't spend time perfecting things in a software package like Photoshop. This is also helpful in that any issues you do encounter will be eliminted, permanently, the second that you fix the problem. Additionally it won't be resolved in a single page either, it will be resolved in every page that the problem would have been present in.
37signals, a company that provides high quality web based products to clients of all sizes has even gone so far to explain why they don't use Photoshop as a part of their design process for site designs:
You can't click a Photoshop mockup. This is probably the number one reason we skip static mockups. They aren't real. Paper isn't real either, but paper doesn't have that expectation. A Photoshop mockup is on your screen. If it's on your screen it should work. You can't pull down menus in a Photoshop mockup, you can't enter text into a field in a Photoshop mockup, you can't click a link in a Photoshop mockup. HTML/CSS, on the other hand, is the real experience.
Photoshop gives you too many tools to focus on the details. When you use Photoshop you can't help but pay attention to the details. The alignment, the specific colors, the exact shapes, the little details that may matter eventually but they certainly don't matter now. The start is about the substance, not about the details. Details are for later.
The text in Photoshop is not the text on the web. Once you're looking at a static Photoshop mockup you can't quickly change the text without going back into Photoshop, changing the text, saving the file, exporting it as a gif/png/jpg, etc. You can't post it online and tell someone to "reload in 5 seconds" like you can when you quickly edit HTML. You have to say "Give me a few minutes...". Also, type in Photoshop never seems to be the right size as type in HTML. It just never seems to feel the same. It doesn't wrap the same, it doesn't space out the same.
Photoshop puts the focus on production, not productivity. Photoshop is about building something to look at, but about building something you can use. When you're just worried about how it's going to look, you spend too much time on production value. HTML/CSS lets you be productive. You're constantly moving forward towards something more and more real with every change.
Photoshop is repeating yourself. Ok, so you've spent 3 days on a mockup in Photoshop. Now what? Now I have to make it all over again in HTML/CSS. Wasted time. Just build it in HTML/CSS and spend that extra time iterating, not rebuilding. If you're not fast enough in HTML/CSS, then spend the time learning how to create in HTML/CSS faster. It's time well spent.
Photoshop isn't collaboration friendly. I sorta touched on this before, but let me hit this point again: HTML/CSS lets you make a change, save, and reload. That's our collaboration flow. "Here, let me change this. Reload." These changes take seconds. "Here, let me float this left instead of right. Reload." Seconds. No selecting a tool, changing a few items around manually, saving, exporting, uploading, giving people the new file name, etc. HTML/CSS is build for rapid iterative prototyping while Photoshop... isn't.
Photoshop is awkward. You can't help but know your way around Photoshop after working in it for 10 years, but I still find it awkward to get simple things done. Working with a pen feels so much more natural to me than going back to the toolbar over and over. A pen can draw anything, but in Photoshop you need to use the text tool to type, the shape tool to draw a shape, the menu bar to adjust this or that, etc.
Finally there are two more advantages to this approach. The first is that it allows you to save time. You're not spending as long in the theory side of the site design, so can dedicate more time to producing the actual product.
The final benefit to this approach to designing a project is that you're no longer limited to seeing your design in a single way. If you have a smartphone you can load up your design in it and see how things look. It allows you to quickly and easily test your site in any browser you would like to use, on any operating system. This will let you look at, identify and resolve any issues you encounter in a timely fashion.
References
Elliot Jay Stocks. (2009). How to create your best layouts. .net magazine. 194, 38-42.
This week I have had a rare opportunity for me to apply some of what I am using in some way outside of practicals and assignments for this unit, or this course in general. This week I have been helping a friend of mine that I worked under as part of my Foundation Degree's Work Placement, Will McNeilly.
As the only designer employed by Thriftway Travel he has quite a lot of work heaped upon him and his weaknesses are with regards to code whilst mine are more design orientated. It provides us with a rather efficient team for producing site content. He creates the design, and I convert it from a Photoshop file into a standards compliant web page. It worked well whilst I was on placement with him and is working quite efficiently once again on his latest design project for the company, their FareTeam site.
Unfortunately, the majority of the material that I will be working on is hidden behind a passworded section of the domain, and cannot be displayed live. I have, however, kept a copy of the code that I have worked on. There are two elements to the design of this simplified piece. The first requirement was that users be able to hide and show sections of the site easily. The second was that other developers of the site should be able to have elements hidden by default.
The first is rather easy to achieve by picking up on clicks. I found the second more troublesome to implement and, ultimately, settled upon an implementation that will work, but that I'm not happy with. By adding a class of hidden to both the link and the content to be hidden they are rendered correctly. The code can be viewed below and a live version of the implementation can be viewed here.
					<?xml version="1.0" encoding="ISO-8859-1"?>
					<!DOCTYPE html PUBLIC "-//W3C//DTD XHTML 1.0 Transitional//EN"
					"http://www.w3.org/TR/xhtml1/DTD/xhtml1-transitional.dtd">
					<html xmlns="http://www.w3.org/1999/xhtml" xml:lang="en" lang="en">
					<head>
					<title>jquery hide/show</title>

					<meta http-equiv="Content-Type" content="text/html; charset=iso-8859-1" />

					<script type="text/javascript" src="../../_js/jquery-1.3.2.min.js"></script>
					<style type="text/css">
					<!--


					.fareRulesHeader{
						height:39px;

						-moz-border-radius-topleft: 5px;
						-moz-border-radius-topright: 5px;
						-webkit-border-top-left-radius:5px;
						-webkit-border-top-right-radius:5px;
					}

					.fareRulesHeader h3{
						background:none!important;
						border: 0!important;
						line-height: 39px!important;
						padding-left:10px;
					}

					.fareRulesSubHeader{
						border:1px solid #d7d7d7;
						height:24px;
						padding:0 10px;
					}
					.fareRulesSubHeader h4{
						display:inline;
						font-weight: 700;
						line-height:24px;
					}
					.fareRulesSubHeader div{
						float:right;
					}

					.farerulesdesc{
						border:1px solid #d7d7d7;
						padding:10px 10px 0;
					}
					-->
					</style>

					<script type="text/javascript">

					$(document).ready(function() {

						//need method to hide content based on a class tag
					    $(".hideshow a.hidden").addClass("show");
						$(".hideshow a.hidden").removeClass("hide");
						$(".hideshow a.hidden").removeClass("hidden");
					    $("div.hidden").hide();
						$("div.hidden").removeClass("hidden");

						$('.hideshow a').click(function(){

							//rel and id tags must match up for content
							//to be hidden and shown correctly
							if($(this).hasClass("hide")){
						        $(this).removeClass("hide");
						        $(this).addClass("show");
						        var tohide = $(this).attr("rel");
								var idtohide= "#"+tohide;
								$(idtohide).hide();
								return false;
							}else{
						        $(this).removeClass("show");
						        $(this).addClass("hide");
						        var toshow = $(this).attr("rel");
								var idtoshow = "#"+toshow;
								$(idtoshow).show();
								return false;
							}
						});
					 });


					</script>

					</head>

					<body>

					<div id="ruleparent">

						<div id="fareRules" class="fareRulesHeader">
							<h3>Fare Rules</h3>
						</div>
						<div class="fareRulesSubHeader">
							<h4>Heading 1</h4>
							<div class="hideshow">
								<a class="hide" title="Hide/Show Content" rel="hide1">Hide/Show</a>
								<a class="backtotop" title="Back to Top">Back to Top</a>
							</div>
						</div>
						<div id="hide1" class="farerulesdesc">
							<p>Lorem ipsum dolor sit amet, consectetur adipisicing elit, sed do eiusmod tempor incididunt ut labore et dolore magna aliqua. Ut enim ad minim veniam, quis nostrud exercitation ullamco laboris nisi ut aliquip ex ea commodo consequat. Duis aute irure dolor in reprehenderit in voluptate velit esse cillum dolore eu fugiat nulla pariatur. Excepteur sint occaecat cupidatat non proident, sunt in culpa qui officia deserunt mollit anim id est laborum.</p>
						</div>
						<div class="fareRulesSubHeader">
							<h4>Heading 2</h4>
							<div class="hideshow">
								<a class="hide" title="Hide/Show Content" rel="hide2">Hide/Show</a>
								<a class="backtotop" title="Back to Top">Back to Top</a>
							</div>
						</div>
						<div id="hide2" class="farerulesdesc">
							<p>Lorem ipsum dolor sit amet, consectetur adipisicing elit, sed do eiusmod tempor incididunt ut labore et dolore magna aliqua. Ut enim ad minim veniam, quis nostrud exercitation ullamco laboris nisi ut aliquip ex ea commodo consequat. Duis aute irure dolor in reprehenderit in voluptate velit esse cillum dolore eu fugiat nulla pariatur. Excepteur sint occaecat cupidatat non proident, sunt in culpa qui officia deserunt mollit anim id est laborum.</p>
						</div>
						<div class="fareRulesSubHeader">
							<h4>Heading 3</h4>
							<div class="hideshow">
								<a class="hide hidden" title="Hide/Show Content" rel="hide3">Hide/Show</a>
								<a class="backtotop" title="Back to Top">Back to Top</a>
							</div>
						</div>
						<div id="hide3" class="farerulesdesc hidden">
							<p>Lorem ipsum dolor sit amet, consectetur adipisicing elit, sed do eiusmod tempor incididunt ut labore et dolore magna aliqua. Ut enim ad minim veniam, quis nostrud exercitation ullamco laboris nisi ut aliquip ex ea commodo consequat. Duis aute irure dolor in reprehenderit in voluptate velit esse cillum dolore eu fugiat nulla pariatur. Excepteur sint occaecat cupidatat non proident, sunt in culpa qui officia deserunt mollit anim id est laborum.</p>
						</div>
						<div class="fareRulesSubHeader">
							<h4>Heading 4</h4>
							<div class="hideshow">
								<a class="hide" title="Hide/Show Content" rel="hide4">Hide/Show</a>
								<a class="backtotop" title="Back to Top">Back to Top</a>
							</div>
						</div>
						<div id="hide4" class="farerulesdesc">
							<p>Lorem ipsum dolor sit amet, consectetur adipisicing elit, sed do eiusmod tempor incididunt ut labore et dolore magna aliqua. Ut enim ad minim veniam, quis nostrud exercitation ullamco laboris nisi ut aliquip ex ea commodo consequat. Duis aute irure dolor in reprehenderit in voluptate velit esse cillum dolore eu fugiat nulla pariatur. Excepteur sint occaecat cupidatat non proident, sunt in culpa qui officia deserunt mollit anim id est laborum.</p>
						</div>
						<div class="fareRulesSubHeader">
							<h4>Heading 5</h4>
							<div class="hideshow">
								<a class="hide" title="Hide/Show Content" rel="hide5">Hide/Show</a>
								<a class="backtotop" title="Back to Top">Back to Top</a>
							</div>
						</div>
						<div id="hide5" class="farerulesdesc">
							<p>Lorem ipsum dolor sit amet, consectetur adipisicing elit, sed do eiusmod tempor incididunt ut labore et dolore magna aliqua. Ut enim ad minim veniam, quis nostrud exercitation ullamco laboris nisi ut aliquip ex ea commodo consequat. Duis aute irure dolor in reprehenderit in voluptate velit esse cillum dolore eu fugiat nulla pariatur. Excepteur sint occaecat cupidatat non proident, sunt in culpa qui officia deserunt mollit anim id est laborum.</p>
						</div>

					</div>
					</body>
					</html>
Handling Images with Jquery
Over the course of the last several weeks I have been attempting to hone my ability to truly craft a web site from scratch. In a feedback session from the DES311 lecturers it was suggested that some of the images I was using were too big and that they gave off the impression that they were just to make my work appear longer.
Whilst this was not the case, I could see the point that they were making and adjusted my images accordingly. I did this by selecting a range of image heights that I would work to, and adjusting my images to match. This has worked well since, until it came to work for this week.
For the work this week I was tasked with auditing the content for my final piece for the unit, my portfolio. On top of this I also had to lay out my site-map for the piece. Both of these involved sketches which, upon scanning them in, I couldn't resize to an appropriate size.
This got me to thinking about how other people were dealing with this problem and caused me to look at other student's learning logs, to see how they handle large images. After looking through several student's designs I stumbled upon Rebekah Northey's design. At first I thought her images were all very small, in a similar (yet much more consistent) manner than my own layout.
It wasn't until I accidentally clicked on one of her images that I realised just how well her images were being controlled using JavaScript. Clicking on the image opened a larger version of the image, typically with more content included.
I really liked the way that JavaScript was being used to handle the images on her learning log. I wasn't, however, too keen on the way that the full scale image was overlaid on top of the page content. It was because of this that I started to play around with my own Jquery package.
What I wanted was a package that would allow for usage of larger images, in a way that didn't take up a vast amount of space until a user decided that they wanted to see the full image, all without the image appearing on top of any aspect of the already existing content.
In the end I coded a package that hides most of the content of large images (which I chose to define as anything over a size of 220 pixels). It does this by wrapping a <p> around the image, and setting the overflow to hidden, and setting the height to 180 pixels. Then, before and after this element it adds a paragraph explaining that the image is bigger, and that clicking on it will expand the image, and an element below the image which contains the alt code for the image, creating a label of sorts for the image. If the image is smaller than 220 pixels, it merely adds the label beneath the image.
The final piece can be seen here. There may be some layout errors in some browsers, such as Camino, Firefox 2.0 and Internet Explorer. This is because the layout is a "Work in Progress" HTML5 layout, which doesn't work in some browsers currently.
@font-face
Over on the DES311 unit we have been refining our portfolio designs. As a part of this I have been looking at how to implement a couple of fonts that I want to use. Typically I would use Cufón to add non-standard fonts, but increasingly the @font-face method is becoming more and more available on browsers. The following is my testing out the @font-face method:
This week I've been working on completing my Group Project as well as my Portfolio redesign for the DES311 module. One of the problems I had was having was dealing with my site's navigation. In particular a drop-down navigation.
The problem I was having was finding a menu that worked with the styling I had implemented. In the end I found a very simple CSS based drop-down menu, with support for Internet Explorer being implemented via jquery.